Chapter 9 Create Landslide Data
We need landslide areas as raster data. The best free resources available for creating landslide data is to use Google Earth. We will identify all the landslide areas within our basin boundary. As the basin boundary is more than \(100km^2\), it is better to divide it into parts to make searching easier. Following steps are recommended to create landslide vector polygons.
- Divide the basin extent into rectangular grid.
- Export basin polygon and the grid to KML (Keyhole Markup Language) format which can be read by Google Earth.
- Open the KML file in Google earth and digitize the landslide polygon within each grid.
Each process will be explained in detail in the following sub-sections.
9.1 Extent of ROI (Region of interest)
Before starting further processing in Grass, change the region to the extent of basin. Run the following code in console:
g.region vector=basin@PERMANENT
To create grid in the new region extent, we use following code. Size of grid is set with box parameter. About 1.8km by 1.2km area seems to be managable in Google Earth.
v.mkgrid map=roigrid box=1800,1200
It will create new vector map roigrid. Clip extra grids outside the region of interest.
v.clip input=roigrid clip=basin output=roigridclip
Export the clipped grid data to kml (Change the output path as appropriate):
v.out.ogr input=roigridclip output=path/to/roi.kml format=KML
9.2 Open Google Earth and zoom to each feature
Open roi.kml in Google Earth. Zoom to each grid one by one and check whether it contains any landslide. In this way all the landslide area can be checked. Following figure shows how to zoom to each figure.
- Expand the kml file.
- Double click a feature.
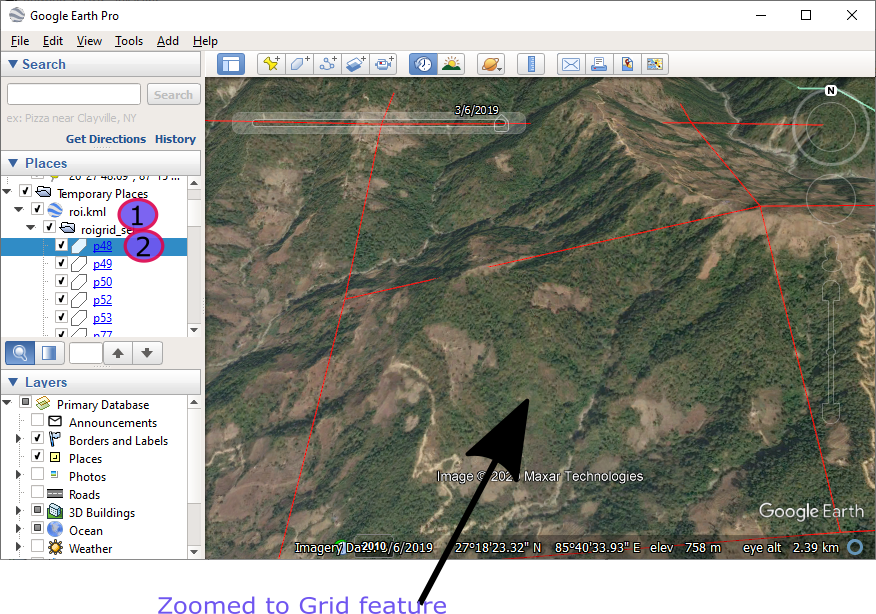
Figure 9.1: Zoom to Feature
9.3 Digitize landslide area
To create landslide polygons, we need to digitize the area in Google Earth.
- Right click Temporary Folder (figure 9.2).
- Click Add->Folder and give name to the folder (e.g. Landslide)
- Right click the Landslide folder and click Add->Polygon. (figure 9.3). A dialog box will appear. You can change the color and opacity of the polygon. Set opacity to 50% opacity so that you can see beneath the polygon while drawing.
- Draw polygon over the landslide while the dialog box is visible.
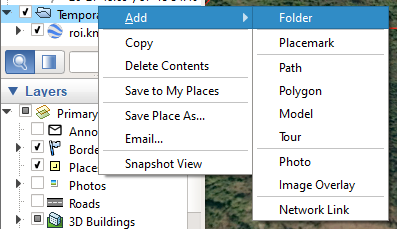
Figure 9.2: Add Folder
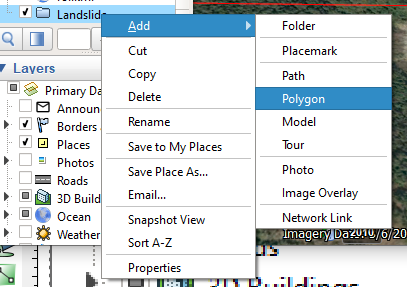
Figure 9.3: Add Landslide Polygon

Figure 9.4: Digitize Polygon
9.4 Save Landslides as kmz (Zipped KML)
After completion of digitizing all the landslide polygons, save the folder as kmz file. See the steps and figure below.
- Right click the folder where all the landslides are created.
- Click Save Place As
- Browse to the folder and save file.
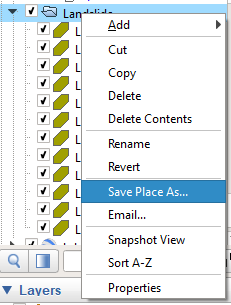
Figure 9.5: Digitize Polygon
9.5 Convert landslide polygons to Grass raster
We need to import and convert the landslide polygons created in Google Earth to Grass raster data. It is very easy two step process.
- Run this code to import kmz:
v.import input=path/to/kmz output=lslist - Run this code to convert it into raster:
v.to.rast input=lslist output=lsrast use=val